Check Out The Video!
Once this process is completed you will be able to send your phone back to your carrier/manufacture without them ever knowing your "modified" your phone.
This guide will support just about ever Galaxy S3 variant including: GT-i9300, T-Mobile SGH-T999, AT&T SGH-i747, Verizon SCH-i535, Sprint SPH-L710, and Bell/Telus/Rogers SGH-i747M.
If your running on Mac OSX 10.6-10.7 this MAY NOT work for you!
NOTE! This will WIPE EVERYTHING off your internal phone memory, back it up!!
If you are going to send your Galaxy S3 back to your carrier/manufacture you FIRST need to reset flash/binary counter!
1. Enter your phone into Download Mode. Turn off your phone then press the volume down, power and home center button. Once your phone vibrates ONLY let go of the power button.
2. Press the volume up to continue and plug in your phone via microUSB.
3. Download/install Heimdall and Samsung Kies to your computer using the links below. Note: Both applications require you to restart your computer!
Download Heimdall
Download Samsung Kies
4. Now go into your Applications folder and open "heimdall-frontend".
5. Go into "Utilities" tab and click on "Detect". Click on "Save As..." and name the file to anything your want. Ex. GalaxyS3PitFile. Then click on "Download".
Also remember where you saved the file!
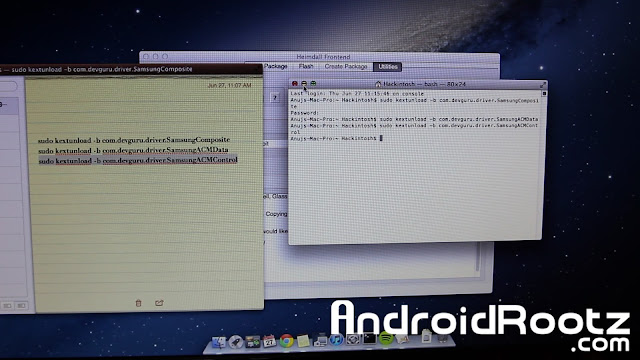
6. Skip this step if your didn't get "ERROR: Claim interface failed!". Open Terminal and copy and paste these commands individually into terminal (watch the video above for detailed instructions). Then repeat step 5.
sudo kextunload -b com.devguru.driver.SamsungComposite
sudo kextunload -b com.devguru.driver.SamsungACMData
sudo kextunload -b com.devguru.driver.SamsungACMControl
7. Download the correct stock zip file to your computer for your Galaxy S3 using the link below.
Download stock tar file for Galaxy S3
8. Unzip the stock file. Open the folder and you should now have a file like this, "XXXXXX.tar.md5" rename the file to only "XXXXXX.tar" and untar the renamed file. (watch the video above for detailed instructions).
9. Go back to Heimdall Frontend and click on the "Flash" tab. Under the PIT section click on "Browse" and locate and select the PIT file you saved in step 5.
10. Click on "Add" and select "ABOOT". Then click on "Browse" and locate "aboot.mbn". It is the folder that was renamed and untarred. Then click "Add" and do the process again for the all files in the folder (watch the video above for detailed instructions).
aboot.mbn --- ABOOT
boot.img --- BOOT
cache.img.ext4 --- CACHE
NON-HLOS.bin --- MODEM
recovery.img --- RECOVERY
rpm.mbn --- RPM
sbl2.mbn --- SLB2
sbl3.mbn --- SLB3
system.img.ext4 --- SYSTEM
tz.mbn --- TZ
11. Once you have selected and located all 10 files, uncheck ("Resume use after "No Reboot"). Then click on "Start".
12. Skip this step if your didn't get "ERROR: Claim interface failed!". Open Terminal and copy and paste these commands individually into terminal (watch the video above for detailed instructions). Then repeat step 11.
sudo kextunload -b com.devguru.driver.SamsungACMData
sudo kextunload -b com.devguru.driver.SamsungACMControl
If that doesn't work then unlpug your phone, take out the battery, put it back in, and enter back into Download Mode. After that plug in your phone and repeat step 11.
13. Heimdall will now flash all the stock files to your phone. This process will take about 5-10 minutes.
14. Once the process is complete your phone will automatically reboot. During the reboot process you will see a green Android, once the green Android loading screen goes away enter into recovery mode.
15. Take out the battery and put it back in. Press the volume up, power button, and home center button. Once you feel a vibration ONLY let go of the power button.
16. Select "wipe data/factory reset" then choose "wipe cache partition". Lastly, select "reboot system now".
17. Once your phone finishes rebooting in about 5 minutes your Galaxy S3 is on completely stock and unrooted! Safe enough to send back to your carrier/manufacture.
Credits - Heimdall
-----------------------------------------------------------------------------------------------------------------------------
Need Help With Your Android Device? Follow Me / Add Me / Like Me
Google Plus
-----------------------------------------------------------------------------------------------------------------------------
Check Out Our YouTube Channel For More Great Guides!
YouTube and Subscribe
-----------------------------------------------------------------------------------------------------------------------------
Galaxy S3 FAQ
How to Root Galaxy S3
How to Install Custom ROMS on Galaxy S3
Please Check Out The Galaxy S3 FAQ Section Before Commenting!
-----------------------------------------------------------------------------------------------------------------------------


